บทความโดยภราดร วรรณสังข์ (Paradorn Wannasung)Marketing Communication Specialist · นิเทศศาสตรมหาบัณฑิต (การสื่อสารการตลาดและแบรนด์)
นิเทศศาสตรมหาบัณฑิต (การสื่อสารการตลาดและแบรนด์) · AERZEN Rental Thailand

AERZEN ออกแบบและผลิต blower และ compressor มาตั้งแต่ปี 1864 — และจากประสบการณ์กว่า 160 ปีในการ commission ระบบลมอัดหลายพันระบบทั่วโลก ข้อสังเกตที่พบซ้ำคือ: เมื่อ pressure ที่ point-of-use ต่ำกว่าที่ควร สาเหตุไม่ได้อยู่ที่ compressor เสมอไป แต่บ่อยครั้งซ่อนอยู่ใน branch piping ที่ undersized, elbow ที่เรียงซ้อนกัน, หรือ filter ที่ไม่ได้เปลี่ยน element มาหลายปี.
สำหรับ Plant Engineer ในโรงงานไทย ปัญหา pressure drop ที่วินิจฉัยผิดทิศมีต้นทุนสองชั้น: ชั้นแรกคือพลังงานที่เสียไปเมื่อปรับ delivery pressure สูงขึ้นเพื่อชดเชย และชั้นที่สองคือ production loss เมื่อ pressure instability ส่งผลกับ pneumatic equipment ปลายสาย. บทความนี้นำเสนอ 5-step diagnosis tree ที่เริ่มจากการอ่าน gauge ที่ point-of-use แล้วไล่กลับไป upstream ทีละ zone — พร้อม quantified threshold และรายการเครื่องมือที่ต้องใช้.
วิศวกรหลายคนเริ่มต้นวินิจฉัยปัญหา pressure drop โดยไปดูที่ compressor ก่อน — ตรวจ outlet pressure, ดู alarm log, วัด power consumption. แนวทางนี้สมเหตุสมผลในบริบท standalone machine testing แต่ ไม่เหมาะกับระบบ distributed piping ที่มีหลาย zone เพราะ:
เริ่มที่จุดที่มีปัญหา (point-of-use) แล้วไล่กลับ upstream — วิธีนี้ตรงกับ diagnostic methodology ที่ Compressed Air Challenge (CAC) และ CAGI (Compressed Air and Gas Institute) แนะนำ. เมื่อพบ zone ที่ pressure drop ผิดปกติ ให้หยุดและวิเคราะห์ก่อนไปต่อ — ไม่จำเป็นต้องไล่ไปถึง compressor ถ้าพบต้นเหตุใน branch piping แล้ว.
บทความนี้ complement (ไม่ซ้ำซ้อนกับ) คู่มือออกแบบระบบท่อลมอัด — บทความออกแบบครอบคลุมการเลือก layout, pipe sizing, และ material ตั้งแต่ต้น ส่วนบทความนี้ใช้เมื่อ ระบบที่ออกแบบแล้วกำลังมีปัญหา pressure drop ในการใช้งานจริง.
ก่อนเริ่ม diagnosis ต้องกำหนด baseline ว่า pressure drop ที่ระดับไหนคือ “ยอมรับได้” และระดับไหนคือ “ปัญหาที่ต้องแก้ไข” มาตรฐานจาก CAGI และ Compressed Air Challenge กำหนดไว้ดังนี้:
| Zone / Segment | Allowable Pressure Drop | สถานะ — ตัวอย่างที่ 7 bar(g) system | เหตุผล / อ้างอิง |
|---|---|---|---|
| Total system (compressor outlet → point-of-use) | ≤ 10% ของ rated delivery pressure | Pass ≤ 0.70 bar Fail > 0.70 bar | CAGI Best Practice Guide; Compressed Air Challenge Manual §3.11 |
| Treatment train (dryer + filter package) | ≤ 0.35 bar รวม | Pass ≤ 0.35 bar Fail > 0.35 bar → เปลี่ยน filter element | ISO 8573-1 filter system design; CAGI filter selection guide |
| Main distribution header (header outlet → branch inlet) | ≤ 0.20 bar | Pass ≤ 0.20 bar Fail > 0.20 bar → undersized header หรือ leak | ASME B31.3 Process Piping; CAC Guidelines |
| Branch piping (branch inlet → point-of-use) | ≤ 0.10 bar | Pass ≤ 0.10 bar Fail > 0.10 bar → undersized branch / excess fittings | CAC Best Practices; industry standard design guideline |
| Local fittings + FRL unit (last 3–5 m ก่อน equipment) | ≤ 0.05 bar | Pass ≤ 0.05 bar Fail > 0.05 bar → clogged FRL filter / undersized fitting | Equipment manufacturer spec (FRL pressure differential); engineering practice |
| ค่า threshold เหล่านี้เป็น guideline สำหรับระบบ compressed air ทั่วไปที่ 7 bar(g). ระบบที่มี pressure ต่างกัน (เช่น low-pressure blower ที่ 0.5–1.0 bar(g)) ต้องใช้ % threshold แทนค่า absolute. อ้างอิง: CAGI Compressed Air System Guide; Compressed Air Challenge Best Practices Manual; ASME B31.3. | |||
Pressure drop diagnosis ต้องการเครื่องมือที่เหมาะสม 3 ชนิด — การใช้ gauge ติดตั้งถาวรของระบบเพียงอย่างเดียวไม่เพียงพอ เพราะ gauge เหล่านั้นมักมีความละเอียดต่ำและไม่ได้ตั้งที่จุดตรวจที่ต้องการ:
ก่อนเริ่ม diagnosis ต้องระบุ pressure tap point ที่มีอยู่ในระบบ และติดตั้ง temporary tap ในตำแหน่งที่ขาด. ระบบที่ออกแบบดีจะมี pressure gauge หรือ tap point อย่างน้อยที่: compressor outlet, after-treatment (หลัง dryer/filter), header outlet ก่อนแยก branch, และ point-of-use หลักทุกจุด. ถ้าระบบขาด tap point การวางแผน diagnosis ต้องรวมถึงการ shut down partial section เพื่อติดตั้ง tap.
Diagnosis tree ด้านล่างทำงานเป็น sequential checklist — ทำตามลำดับ, บันทึกผลการวัดทุกขั้นตอน, และหยุดที่ขั้นตอนที่พบ pressure drop เกิน threshold ก่อนสรุปสาเหตุ. อย่าข้ามขั้นตอน เพราะระบบที่มีปัญหาหลาย zone พร้อมกันมีอยู่จริง.
อ่าน pressure gauge ที่ equipment ที่แจ้งปัญหา (หรือ tap point ที่ใกล้ที่สุด). บันทึกค่า PPOU และเปรียบเทียบกับ required operating pressure ของ equipment นั้น (ตาม manufacturer spec).
บันทึก: ค่า deficit = Psetpoint – PPOU. นี่คือ total pressure drop ที่ต้องอธิบายใน Steps 2–5.
วัด pressure ทันทีก่อน FRL unit (Filter-Regulator-Lubricator) และทันทีหลัง FRL unit. ตรวจ differential. ตรวจ ball valve, flexible hose, และ connector fitting ด้วย ultrasonic leak detector.
หาก leak detector ตรวจพบ leak ที่ local fitting: บันทึกตำแหน่ง, ประมาณ flow loss, และกำหนด repair schedule. Leak ขนาด 1.5 mm orifice ที่ 7 bar สูญเสียประมาณ 0.25 m³/min — ซึ่งมีนัยสำคัญต่อระบบขนาดเล็ก.
ติดตั้ง manometer ที่จุดที่ branch piping แยกออกจาก main header (header takeoff point) และวัด differential เทียบกับ PPOU ที่วัดในขั้นตอนที่ 1. ใช้ flow meter วัด actual flow rate ใน branch นี้เปรียบเทียบกับ design flow.
หาก actual flow > design flow: branch กำลัง over-loaded — ปัญหาที่ demand side ไม่ใช่ piping. หาก actual flow ≈ design flow แต่ ΔP สูง: pipe ขนาดเล็กเกินไป หรือ equivalent length ของ fittings ในสายสูงกว่าที่คาด.
วัด pressure ที่ main header outlet (ปลาย header ก่อนกระจาย branch) และที่ treatment train outlet (หลัง dryer + final filter ก่อนเข้า header). คำนวณ ΔP แต่ละ segment.
Filter differential pressure indicator (DP indicator บน filter housing) ที่แสดง “red zone” เป็น signal ชัดเจนที่สุดว่า filter element ต้องเปลี่ยน. อย่ารีเซ็ต indicator โดยไม่เปลี่ยน element — นี่คือ root cause ที่พบบ่อยที่สุดใน treatment train pressure drop.
Scan leak detector ตลอดเส้น header — header flange joint, valve packing, และ drain valve เป็นจุด leak ที่พบบ่อยในระบบอายุ > 5 ปี.
หากขั้นตอนที่ 2–4 ไม่พบ pressure drop เกิน threshold รวมกันพอที่จะอธิบาย deficit จาก Step 1 ให้ตรวจที่ unit output. วัด pressure ทันทีที่ outlet ของ compressor/blower unit (ก่อนชุด treatment) และบันทึก actual flow rate.
สำหรับ rental unit: บันทึก timestamp, outlet pressure, outlet flow, inlet temperature, และ ambient conditions ณ เวลาที่วัด. ข้อมูลนี้คือหลักฐานที่ใช้ใน SLA dispute process (ดู Section 6).
หน่วยส่วนใหญ่ที่ performance เสื่อม (สำหรับ rotary lobe หรือ screw technology) จะแสดงอาการผ่าน: เสียงผิดปกติ, motor current สูงผิดปกติ, outlet temperature สูง, หรือ vibration เพิ่ม — อาการเหล่านี้ทำให้แยกแยะได้ชัดเจนว่า unit มีปัญหาจริง ไม่ใช่ piping.
Equivalent length (Le) คือความยาวท่อตรงที่ก่อ pressure drop เท่ากับ fitting นั้น แสดงในหน่วย “D” (pipe diameter). ใช้ตารางนี้ใน Step 3 เพื่อประมาณ total equivalent length ของ branch และตรวจสอบว่า ΔP ที่คำนวณตรงกับที่วัดได้หรือไม่:
| Fitting Type | Equivalent Length (D) | ตัวอย่าง — DN 50 (ID 52.5 mm) Le = D × mm / 1000 | หมายเหตุ |
|---|---|---|---|
| Elbow 90° (standard radius) | 30–40 D | 1.58–2.1 m | พบบ่อยที่สุด — เส้นสาย 4 elbow = เพิ่ม 8 m equivalent length |
| Elbow 90° (long radius, R = 1.5D) | 16–20 D | 0.84–1.05 m | Long-radius elbow ลด pressure drop ได้ครึ่งหนึ่ง — แนะนำสำหรับ main header |
| Elbow 45° | 16 D | 0.84 m | ดีกว่า 90° standard แต่ยังสูงกว่า long-radius 90° |
| Tee — through-flow (straight run) | 20 D | 1.05 m | Flow ผ่านตรง — resistance ต่ำ |
| Tee — branch flow (side outlet) | 60–90 D | 3.15–4.73 m | Flow เลี้ยวออก branch — resistance สูงมาก; ใช้ reduced tee หรือ wye fitting แทน |
| Gate valve (fully open) | 8 D | 0.42 m | ต้องเปิดเต็ม 100% เสมอ — ถ้าเปิดครึ่งเดียว Le พุ่งขึ้นหลายเท่า |
| Ball valve (fully open) | 3–5 D | 0.16–0.26 m | Ball valve เหมาะกว่า gate valve สำหรับ compressed air — ตรวจสอบ full bore vs. reduced bore |
| Swing check valve | 50–100 D | 2.63–5.25 m | Check valve คือ pressure drop สูงสุดในกลุ่ม — ใช้เฉพาะที่จำเป็น; แนะนำ wafer check แทน |
| Strainer / Y-filter (clean) | 40–60 D | 2.1–3.15 m | เมื่อ screen อุดตัน Le พุ่งขึ้นเป็นเท่าตัว — ตรวจ DP indicator สม่ำเสมอ |
| Reducer (concentric, 2:1 ratio) | 10–15 D | 0.53–0.79 m | อ้างอิงจาก outlet diameter (D ที่เล็กกว่า) |
| Equivalent length values จาก Crane Technical Paper No. 410 (Fluid Flow in Valves, Fittings, and Pipe); CAGI Compressed Air System Guide; Compressed Air Challenge Best Practices Manual. ค่าเป็น approximation — ค่าจริงขึ้นอยู่กับ fitting manufacturer, schedule pipe, และ Reynolds number. การออกแบบจริงใช้ K-factor method หรือ pipe flow simulation software (เช่น PIPE-FLO) สำหรับ accuracy สูงกว่า. | |||
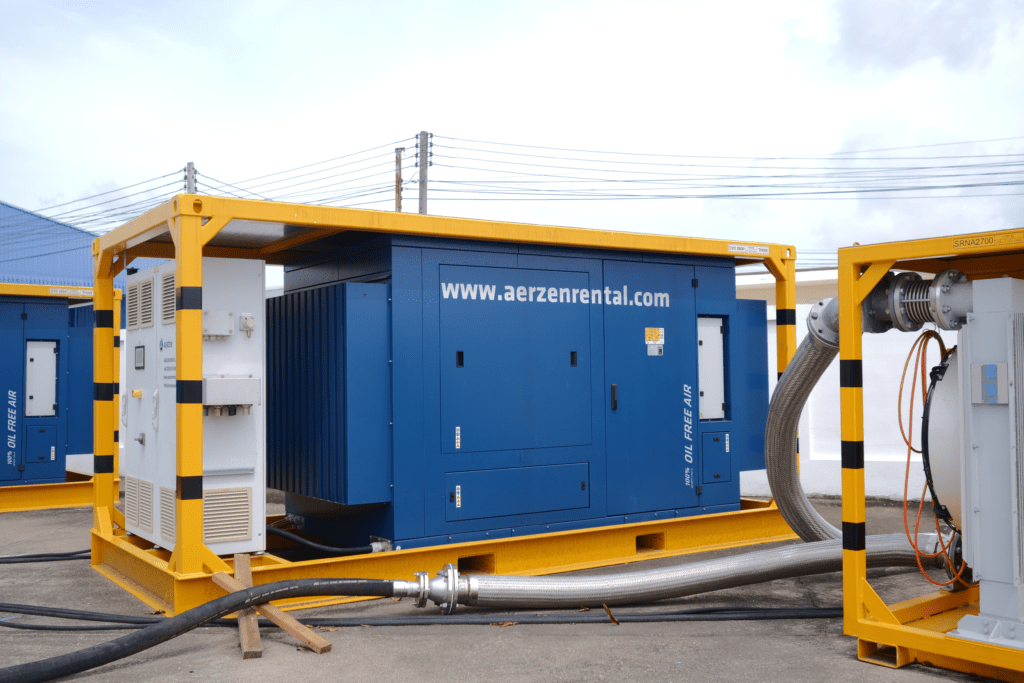
สถานการณ์ที่พบบ่อยในการใช้งาน rental blower/compressor: Plant Engineer พบ pressure ที่ point-of-use ต่ำกว่าที่ระบุในสัญญาเช่า และแจ้งว่า “rental unit ทำงานไม่ได้ตาม spec”. ก่อนที่ dispute จะลุกลาม diagnosis tree สามารถช่วยแยกแยะ อย่างเป็นกลาง ว่าต้นเหตุอยู่ที่ใด:
| ผลการ Diagnosis | ความหมาย | ขั้นตอนถัดไป |
|---|---|---|
| Steps 2–4 พบ ΔP รวมเกิน budget — Step 5 unit outlet ปกติ | ปัญหาอยู่ที่ site piping ไม่ใช่ rental unit | แก้ไข piping (เปลี่ยน filter element, เปลี่ยน fitting, ซ่อม leak) — rental unit ไม่ผิด SLA |
| Steps 2–4 ปกติทุก zone — Step 5 unit outlet pressure/flow ต่ำกว่า rated spec | Unit performance ต่ำกว่า spec — rental unit อาจผิด SLA | แจ้ง service team พร้อม evidence log (timestamp, outlet P, outlet Q, ambient conditions) — เปิด SLA dispute ticket |
| Steps 2–5 มีปัญหาหลาย zone พร้อมกัน | Compounding factors — site piping + unit performance ต่างมีส่วน | ระบุ contribution ของแต่ละ zone เป็น % ของ total deficit — รายงานแยกชัดเจน |
| การแยกแยะที่ชัดเจนนี้ไม่เพียงแต่ช่วยระบุต้นเหตุ — แต่ยังป้องกันค่าใช้จ่ายที่ไม่จำเป็นจากการเปลี่ยน unit โดยไม่ได้แก้ปัญหาที่แท้จริง. | ||
เมื่อ diagnosis tree ชี้ไปที่ unit performance issue บันทึกข้อมูลต่อไปนี้ในรูปแบบที่ timestamp ครบถ้วน:
ข้อมูลชุดนี้เพียงพอสำหรับ AERZEN service team ในการ plot operating point บน performance curve และยืนยันหรือโต้แย้งว่า unit อยู่ใน spec หรือไม่. หากต้องการความช่วยเหลือในการตีความผล ติดต่อทีมงาน AERZEN Rental Thailand ได้โดยตรง.
ทีม Field Engineer ของ AERZEN Rental Thailand พร้อมให้ความช่วยเหลือ on-site pressure drop diagnosis, ตรวจสอบ SLA evidence, และจัดหา standby rental unit ภายใน 24 ชั่วโมง. บริการครอบคลุมทั่วพื้นที่ EEC, กรุงเทพฯ, และโรงงานอุตสาหกรรมทั่วประเทศ.
Rent a solution. Expect performance.
Gauge ติดตั้งถาวรมักมีข้อจำกัดสำคัญสองอย่าง: ความละเอียด (accuracy class) มักอยู่ที่ Class 2.5 (±2.5% FS) ซึ่งหมายความว่าใน gauge 0–10 bar ค่า error ได้ถึง ±0.25 bar — สูงกว่า threshold ที่ต้องการวัด (0.05–0.10 bar); และตำแหน่ง gauge ไม่ตรงกับ tap point ที่ต้องการสำหรับ diagnosis แต่ละขั้นตอน. Portable digital manometer Class 0.5 ให้ความละเอียด ±0.025 bar ที่ FSD ซึ่งพอสำหรับ differential measurement ที่ ≤ 0.1 bar resolution.
ทำ diagnosis ขณะ production กำลังเดิน (หรืออย่างน้อยขณะ compressed air system กำลัง supply ที่ load ปกติ) เพราะ pressure drop เป็น dynamic phenomenon — ที่ load ต่ำ pressure drop จะต่ำกว่าความเป็นจริง. การวัดที่ no-load condition (ทุกวาล์วปิด) จะแสดงแค่ static pressure ซึ่งไม่บอกอะไรเกี่ยวกับ system resistance ในการใช้งานจริง. ข้อยกเว้น: การติดตั้ง temporary pressure tap point ต้องหยุดบาง section ชั่วคราว — วางแผน access window ระหว่าง shift หรือ planned maintenance.
Compressed Air Challenge (CAC) แนะนำ leak survey อย่างน้อยปีละ 1–2 ครั้ง สำหรับโรงงานขนาดกลาง-ใหญ่ หรือทันทีหลังพบ pressure drop ผิดปกติ. Leak ในระบบ compressed air ของโรงงานทั่วไปคิดเป็น 20–30% ของ total compressed air consumption4 — ซึ่งหมายความว่าระบบที่ใช้ 10 m³/min อาจสูญเสีย 2–3 m³/min เป็น leak โดยที่ไม่รู้ตัว. ที่ระดับนี้ leak มีนัยสำคัญโดยตรงต่อ system pressure โดยเฉพาะในช่วง peak demand.
ไม่ได้ — threshold absolute (เช่น ≤ 0.10 bar สำหรับ branch) ออกแบบมาสำหรับระบบ compressed air ที่ 5–10 bar(g). สำหรับ low-pressure blower (เช่น aeration blower ที่ 0.3–0.8 bar(g)) ต้องใช้ % threshold แทน: system total pressure drop ≤ 10% ของ delivered pressure ยังใช้ได้ แต่ค่า absolute จะต่ำกว่ามาก เช่น ระบบ 0.5 bar(g) — system ΔP ≤ 0.05 bar. นี่คือเหตุผลว่าทำไม piping sizing สำหรับ low-pressure blower ต้องใช้ pipe size ที่ใหญ่กว่าสัดส่วนมาก เมื่อเทียบกับ flow rate เดียวกันในระบบ high-pressure.
มีสามทางเลือกที่ไม่ใช่การปรับ setpoint ขึ้น (ซึ่งเพิ่ม energy cost ทุก 1 bar ≈ 6–7% energy เพิ่ม): (1) ติดตั้ง booster หรือ local pressure regulation ที่ point-of-use เพื่อ isolate pressure requirement ของ equipment นั้น; (2) จัด rental unit เพิ่ม (parallel) เพื่อลด system resistance relative ต่อ flow demand รวม; (3) ลด demand ชั่วคราวโดยปิด non-critical branch เพื่อให้ pressure ที่ critical branch เพียงพอ. AERZEN Rental Thailand สามารถจัด standby rental unit หรือ booster unit ภายใน 24 ชั่วโมง — ติดต่อทีมงานเพื่อรับคำแนะนำ.
📋 Last technical review: · AERZEN Rental Thailand Engineering Team · AERZEN Rental Thailand

ภราดร วรรณสังข์ (Paradorn Wannasung)
Marketing Communication Specialist · นิเทศศาสตรมหาบัณฑิต (การสื่อสารการตลาดและแบรนด์)
ภราดร (Paradorn) เป็นผู้ดูแลด้านการสื่อสารการตลาดของ AERZEN Rental Thailand จบนิเทศศาสตรมหาบัณฑิต (การสื่อสารการตลาดและแบรนด์) เชี่ยวชาญด้านอุตสาหกรรม B2B ในประเทศไทย มีประสบการณ์การสร้างแบรนด์และคอนเทนต์ในกลุ่มอุตสาหกรรมของไทย
ติดต่อ: pwa@aerzenrental.com · LinkedIn